-
HA InfluxDB 作为 Prometheus 的后端存储
前言
Prometheus是自带数据存储功能的。不过保存的时间默认为15天。
对用户而言,Prometheus自带的本地存储的方式最大的优点是简单易用,基本无需配置。但缺点也是比较明显的:
- 数据无法长久保存,尤其是变更比较频繁的监控对象产生的数据,通常这种情况除了会导致性能问题外,还可能造成数据的丢失,比如K8S的监控
- 基于本地存储的话,Prometheus监控系统扩展比较难
以上缺点可以配置远程存储解决,使用remote_write和remote_read这两个接口,从第三方存储服务中进行监控数据的读写。
本文描述了一种基于 Influx-relay 和 Nginx 提供高可用 InfluxDB 存储的方法。
1.Prometheus 存储问题及解决方案
Prometheus本地存储专为短期且性能要求不高的数据而设计的,因此,使用的时候需要确认当前数据的保留期限以及相应的可用性要求。为了让我们将持久数据存储更长的时间,我们使用了“外部存储”机制。在这种模式下,Prometheus 将自己的数据复制到外部存储。
Prometheus高可用有多种方案,但我们选择了通过 InfluxDB 实现的高可用解决方案。InfluxDB 是一种可靠且强大的存储软件,有很多功能。此外,它非常适合与Grafana对接,从而提供可视化监控 。
软件
版本
Prometheus
2.3.0
Grafana
6.0.0
2.InfluxDB 安装概览
在我们的部署过程中,我们遵循了Influx-Relay 官方文档(
https://github.com/influxdata/influxdb-relay/blob/master/README.md)。安装需要三个节点:第一个和第二个是运行 Influx-relay 守护进程的 InfluxDB 实例
第三个是运行 Nginx 的负载均衡节点
根据InfluxDB 官方推荐的 Influx-Relay 方案,推荐使用 5 节点(四个 InfluxDB 实例 + Loadbalancer 节点),但三个节点足以满足我们的工作负载。
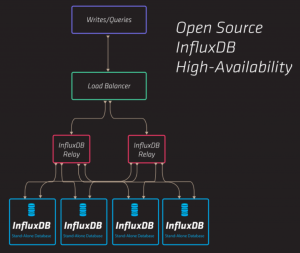
节点上操作系统都使用了 Ubuntu Xenial。见下表软件版本:
Software
Version
Ubuntu
Ubuntu 16.04.1 LTS
Kernel
4.4.0-47-generic
InfluxDB
2.1
Influx-Relay
adaa2ea7bf97af592884fcfa57df1a2a77adb571
Nginx
nginx/1.16.0
部署 InfluxDB HA 我们使用了本文7.1中描述的Influxdb HA 部署脚本 。
3.InfluxDB HA机制实现
HA 机制已从 InfluxDB(自版本 1.xx 起)移出,现在仅作为企业选项提供。目前有一个官方的fork还在活跃,这里主要讲一下目前活跃的relay的fork,github地址在influxdb-relay(
https://github.com/vente-privee/influxdb-relay)。01 Influx-Relay
Influx-relay 是用 Golang 编写的,其原理总结为将写入查询代理到多个目的地(InfluxDB 实例)。Influx-Relay 在每个 InfluxDB 节点上运行,因此任何 InfluxDB 实例的写入请求都会在所有其他节点上进行镜像。Influx-Relay 轻巧而健壮,不会消耗太多系统资源。请参阅本文7.3描述的Influx-Relay配置。
02 nginx
Nginx 守护进程在单独的节点上运行并充当负载均衡器(上游代理模式)。它将“/query”查询直接重定向到每个 InfluxDB 实例,并将“/write”查询重定向到每个 Influx-relay 守护进程。轮询算法被调度用于查询和写入。这样,传入的读取和写入在整个 InfluxDB 集群中均衡。请参阅本文7.4描述的Nginx配置。
4.InfluxDB 监控
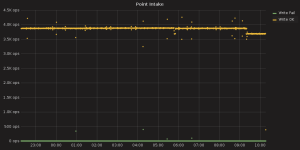
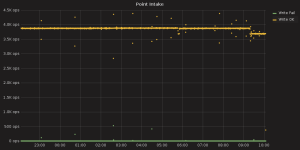
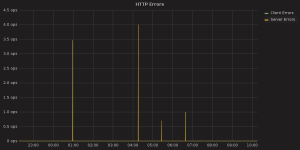
InfluxDB HA 安装使用 Prometheus 进行了测试,该 Prometheus 轮询 200 节点的服务,并生成大量流向其外部存储的数据流。为了测试 InfluxDB 性能,在 Grafana 的帮助下使用并可视化了“_internal”数据库计数器。我们发现 3 节点的 InfluxDB HA 可以轻松处理 200 节点的 Prometheus 负载,并且总体性能不会降低。用于 InfluxDB 监控的 Grafana 仪表板可以在参考本文的7.5部分。
5.InfluxDB HA 性能数据
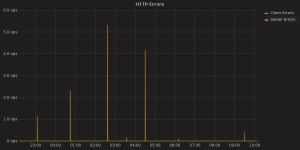
01 InfluxDB 数据库性能数据
这些图表是通过Grafana 根据原生存储在 InfluxDB ‘_internal’ 数据库中的指标构建的。为了创建可视化,我们使用了 Grafana InfluxDB Dashboard(https://docs.openstack.org/developer/performanc-docs/methodologies/monitoring/influxha.html#grafana-influxdb-dashboard)。
InfluxDB node1 数据库性能
InfluxDB node2 数据库性能
-1-300x150.png)
-300x150.png)
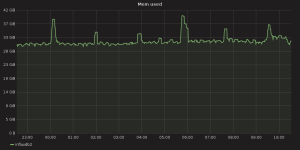
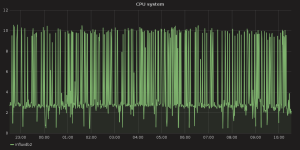
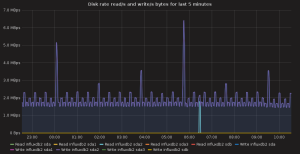
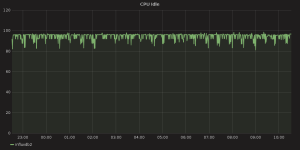
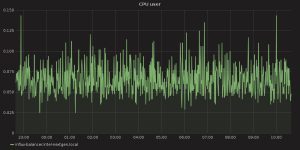
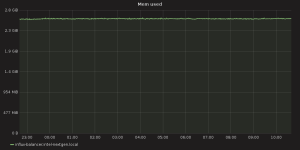
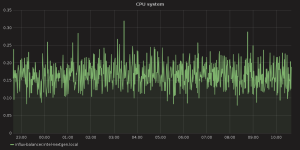
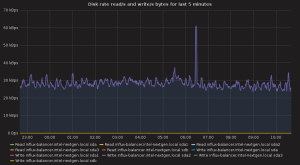
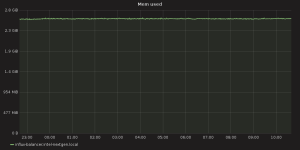
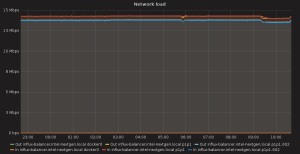
02 操作系统性能数据
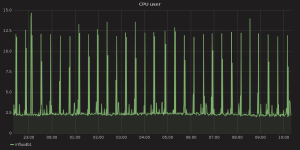
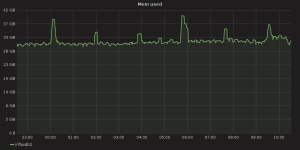
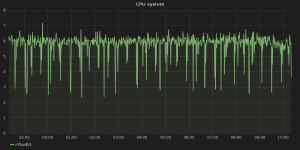
操作系统性能指标是使用 Telegraf 代理收集的,该代理安装在每个集群节点上,并按需启用需要的插件。请参阅Containerized Openstack Monitoring(https://docs.openstack.org/developer/performance-docs/methodologies/monitoring/index.html)文档中的Telegraf 系统(https://docs.openstack.org/developer/performance-docs/methodologies/monitoring/index.html#telegraf-sys-conf) 配置文件。
01
InfluxDB node1 操作系统性能
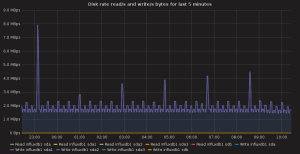
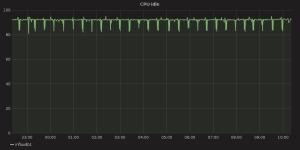
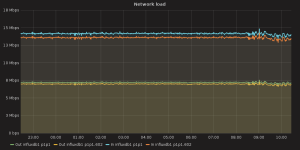
02
InfluxDB node2 操作系统性能
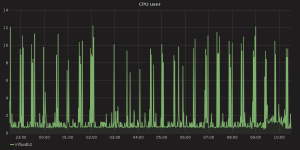
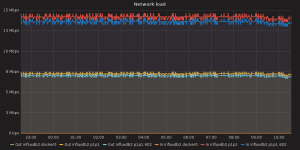
03
负载均衡节点操作系统性能
6.如何部署
- 准备三个有工作网络和 Internet 访问权限的 Ubuntu Xenial 节点
- 暂时允许 root 用户 ssh 访问
- 解压 influx_ha_deployment.tar
- 在 influx_ha/deploy_influx_ha.sh 中设置对应的 SSH_PASSWORD 变量
- 配置节点 ip 变量,启动部署脚本,例如INFLUX1=172.20.9.29INFLUX2=172.20.9.19 BALANCER=172.20.9.27 bash -xe influx_ha/deploy_influx_ha.sh
7.应用程序
01 InfluxdbHA 部署脚本
#!/bin/bash -xe INFLUX1=${INFLUX1:-172.20.9.29} INFLUX2=${INFLUX2:-172.20.9.19} BALANCER=${BALANCER:-172.20.9.27} SSH_PASSWORD="r00tme" SSH_USER="root" SSH_OPTIONS="-o StrictHostKeyChecking=no -o UserKnownHostsFile=/dev/null" type sshpass || (echo "sshpass is not installed" && exit 1) ssh_exec() { node=$1 shift sshpass -p ${SSH_PASSWORD} ssh ${SSH_OPTIONS} ${SSH_USER}@${node} "$@" } scp_exec() { node=$1 src=$2 dst=$3 sshpass -p ${SSH_PASSWORD} scp ${SSH_OPTIONS} ${2} ${SSH_USER}@${node}:${3} } # prepare influx1: ssh_exec $INFLUX1 "echo 'deb https://repos.influxdata.com/ubuntu xenial stable' > /etc/apt/sources.list.d/influxdb.list" ssh_exec $INFLUX1 "apt-get update && apt-get install -y influxdb" scp_exec $INFLUX1 conf/influxdb.conf /etc/influxdb/influxdb.conf ssh_exec $INFLUX1 "service influxdb restart" ssh_exec $INFLUX1 "echo 'GOPATH=/root/gocode' >> /etc/environment" ssh_exec $INFLUX1 "apt-get install -y golang-go && mkdir /root/gocode" ssh_exec $INFLUX1 "source /etc/environment && go get -u github.com/influxdata/influxdb-relay" scp_exec $INFLUX1 conf/relay_1.toml /root/relay.toml ssh_exec $INFLUX1 "sed -i -e 's/influx1_ip/${INFLUX1}/g' -e 's/influx2_ip/${INFLUX2}/g' /root/relay.toml" ssh_exec $INFLUX1 "influxdb-relay -config relay.toml &" # prepare influx2: ssh_exec $INFLUX2 "echo 'deb https://repos.influxdata.com/ubuntu xenial stable' > /etc/apt/sources.list.d/influxdb.list" ssh_exec $INFLUX2 "apt-get update && apt-get install -y influxdb" scp_exec $INFLUX2 conf/influxdb.conf /etc/influxdb/influxdb.conf ssh_exec $INFLUX2 "service influxdb restart" ssh_exec $INFLUX2 "echo 'GOPATH=/root/gocode' >> /etc/environment" ssh_exec $INFLUX2 "apt-get install -y golang-go && mkdir /root/gocode" ssh_exec $INFLUX2 "source /etc/environment && go get -u github.com/influxdata/influxdb-relay" scp_exec $INFLUX2 conf/relay_2.toml /root/relay.toml ssh_exec $INFLUX2 "sed -i -e 's/influx1_ip/${INFLUX1}/g' -e 's/influx2_ip/${INFLUX2}/g' /root/relay.toml" ssh_exec $INFLUX2 "influxdb-relay -config relay.toml &" # prepare balancer: ssh_exec $BALANCER "apt-get install -y nginx" scp_exec $BALANCER conf/influx-loadbalancer.conf /etc/nginx/sites-enabled/influx-loadbalancer.conf ssh_exec $BALANCER "sed -i -e 's/influx1_ip/${INFLUX1}/g' -e 's/influx2_ip/${INFLUX2}/g' /etc/nginx/sites-enabled/influx-loadbalancer.conf" ssh_exec $BALANCER "service nginx reload" echo "INFLUX HA SERVICE IS AVAILABLE AT http://${BALANCER}:7076"01配置压缩包(用于部署脚本)
influx_ha_deployment.tar`(https://docs.openstack.org/developer/performance-docs/_downloads/influx_ha_deployment.tar)
02 InfluxDB 配置
reporting-disabled = false
bind-address = ":8088"


[meta]
  dir = "/var/lib/influxdb/meta"
  retention-autocreate = true
  logging-enabled = true


[data]
  dir = "/var/lib/influxdb/data"
  wal-dir = "/var/lib/influxdb/wal"
  query-log-enabled = true
  cache-max-memory-size = 1073741824
  cache-snapshot-memory-size = 26214400
  cache-snapshot-write-cold-duration = "10m0s"
  compact-full-write-cold-duration = "4h0m0s"
  max-series-per-database = 0
  max-values-per-tag = 100000
  trace-logging-enabled = false


[coordinator]
  write-timeout = "10s"
  max-concurrent-queries = 0
  query-timeout = "0s"
  log-queries-after = "0s"
  max-select-point = 0
  max-select-series = 0
  max-select-buckets = 0


[retention]
  enabled = true
  check-interval = "30m0s"


[shard-precreation]
  enabled = true
  check-interval = "10m0s"
  advance-period = "30m0s"


[admin]
  enabled = false
  bind-address = ":8083"
  https-enabled = false
  https-certificate = "/etc/ssl/influxdb.pem"


[monitor]
  store-enabled = true
  store-database = "_internal"
  store-interval = "10s"


[subscriber]
  enabled = true
  http-timeout = "30s"
  insecure-skip-verify = false
  ca-certs = ""
  write-concurrency = 40
  write-buffer-size = 1000


[http]
  enabled = true
  bind-address = ":8086"
  auth-enabled = false
  log-enabled = true
  write-tracing = false
  pprof-enabled = true
  https-enabled = false
  https-certificate = "/etc/ssl/influxdb.pem"
  https-private-key = ""
  max-row-limit = 10000
  max-connection-limit = 0
  shared-secret = ""
  realm = "InfluxDB"
  unix-socket-enabled = false
  bind-socket = "/var/run/influxdb.sock"


[[graphite]]
  enabled = false
  bind-address = ":2003"
  database = "graphite"
  retention-policy = ""
  protocol = "tcp"
  batch-size = 5000
  batch-pending = 10
  batch-timeout = "1s"
  consistency-level = "one"
  separator = "."
  udp-read-buffer = 0


[[collectd]]
  enabled = false
  bind-address = ":25826"
  database = "collectd"
  retention-policy = ""
  batch-size = 5000
  batch-pending = 10
  batch-timeout = "10s"
  read-buffer = 0
  typesdb = "/usr/share/collectd/types.db"
  security-level = "none"
  auth-file = "/etc/collectd/auth_file"


[[opentsdb]]
  enabled = false
  bind-address = ":4242"
  database = "opentsdb"
  retention-policy = ""
  consistency-level = "one"
  tls-enabled = false
  certificate = "/etc/ssl/influxdb.pem"
  batch-size = 1000
  batch-pending = 5
  batch-timeout = "1s"
  log-point-errors = true


[[udp]]
  enabled = false
  bind-address = ":8089"
  database = "udp"
  retention-policy = ""
  batch-size = 5000
  batch-pending = 10
  read-buffer = 0
  batch-timeout = "1s"
  precision = ""


[continuous_queries]
  log-enabled = true
  enabled = true
  run-interval = "1s"
03 Influx-Relay配置
01
第一个实例
# Name of the HTTP server, used for display purposes only
[[http]]
name = "influx-http"


# TCP address to bind to, for HTTP server
bind-addr = "influx1_ip:9096"


# Array of InfluxDB instances to use as backends for Relay
# name: name of the backend, used for display purposes only.
# location: full URL of the /write endpoint of the backend
# timeout: Go-parseable time duration. Fail writes if incomplete in this time.
# skip-tls-verification: skip verification for HTTPS location. WARNING: it's insecure. Don't use in production.
output = [
    { name="local-influx1", location = "http://127.0.0.1:8086/write", timeout="10s"  },
    { name="remote-influx2", location = "http://influx2_ip:8086/write", timeout="10s"  },
]


[[udp]]
# Name of the UDP server, used for display purposes only
name = "influx-udp"


# UDP address to bind to
bind-addr = "127.0.0.1:9096"


# Socket buffer size for incoming connections
read-buffer = 0 # default


# Precision to use for timestamps
precision = "n" # Can be n, u, ms, s, m, h


# Array of InfluxDB UDP instances to use as backends for Relay
# name: name of the backend, used for display purposes only.
# location: host and port of backend.
# mtu: maximum output payload size
output = [
    { name="local-influx1-udp", location="127.0.0.1:8089", mtu=512 },
    { name="remote-influx2-udp", location="influx2_ip:8089", mtu=512 },
]
02
第二个实例
# Name of the HTTP server, used for display purposes only
[[http]]
name = "influx-http"


# TCP address to bind to, for HTTP server
bind-addr = "influx2_ip:9096"


# Array of InfluxDB instances to use as backends for Relay
# name: name of the backend, used for display purposes only.
# location: full URL of the /write endpoint of the backend
# timeout: Go-parseable time duration. Fail writes if incomplete in this time.
# skip-tls-verification: skip verification for HTTPS location. WARNING: it's insecure. Don't use in production.
output = [
    { name="local-influx2", location = "http://127.0.0.1:8086/write", timeout="10s"  },
    { name="remote-influx1", location = "http://influx1_ip:8086/write", timeout="10s"  },
]


[[udp]]
# Name of the UDP server, used for display purposes only
name = "influx-udp"


# UDP address to bind to
bind-addr = "127.0.0.1:9096"


# Socket buffer size for incoming connections
read-buffer = 0 # default


# Precision to use for timestamps
precision = "n" # Can be n, u, ms, s, m, h


# Array of InfluxDB UDP instances to use as backends for Relay
# name: name of the backend, used for display purposes only.
# location: host and port of backend.
# mtu: maximum output payload size
output = [
    { name="local-influx2-udp", location="127.0.0.1:8089", mtu=512 },
    { name="remote-influx1-udp", location="influx1_ip:8089", mtu=512 },
]
04 Nginx 配置
    client_max_body_size 20M;


  upstream influxdb {
    server influx1_ip:8086;
    server influx2_ip:8086;
  }
  upstream relay {
    server influx1_ip:9096;
    server influx2_ip:9096;
  }


  server {
    listen 7076;
    location /query {
      limit_except GET {
        deny all;
      }
      proxy_pass http://influxdb;
    }
    location /write {
      limit_except POST {
        deny all;
      }
      proxy_pass http://relay;
    }
  }


# stream {
#   upstream test {
#     server server1:8003;
#     server server2:8003;
#   }
#
#   server {
#     listen 7003 udp;
#     proxy_pass test;
#     proxy_timeout 1s;
#     proxy_responses 1;
#   }
# }
05 Grafana InfluxDB Dashboard
Influxdb对接Grafana所使用的Dashboard图形可以参考InfluxDB_Dashboard.json(
https://docs.openstack.org/developer/performance-docs/_downloads/InfluxDB_Dashboard.json)8.最后
目前influxdb本身的集群方案属于闭源状态,而本身的开源的influxdb并不支持高可用集群。Prometheus本身不推荐作为数据存储的工具,因此,通过influxdb-relay可以实现相对完善,可靠的监控高可用方案。
参考:
-
https://docs.openstack.org/developer/performance-docs/methodologies/monitoring/influxha.html#influxdbha-deployment-script
-
https://yeya24.github.io/post/influxdb_ha/
-
https://github.com/influxdata/influxdb-relay
-
https://github.com/vente-privee/influxdb-relay

云和安全管理服务专家


